


 Is your camera vertically challenged? It is if you never turn it sideways to take a vertical picture. All sorts of things look better in a vertical picture.
From a lighthouse near a cliff to the Eiffel Tower to your four-year-old niece jumping in a puddle. So next time out, make a conscious effort to turn your camera sideways and take some vertical pictures.


But don't get too close or your pictures will be blurry. The closest focusing distance for most cameras is about three feet, or about one step away from your camera. If you get closer than the closest focusing distance of your camera (see your manual to be sure), your pictures will be blurry.


Next Tip - Coming tomorrow… Don’t have patience? subscribe to RSS/Email Feed
Previous Tip - Lock Focus

If your subject is not in the center of the picture, you need to lock the focus to create a sharp picture. Most auto-focus cameras focus on whatever is in the center of the picture. But to improve pictures, you will often want to move the subject away from the center of the picture. If you don't want a blurred picture, you'll need to first lock the focus with the subject in the middle and then recompose the picture so the subject is away from the middle.
Usually you can lock the focus in three steps. First, center the subject and press and hold the shutter button halfway down. Second, reposition your camera (while still holding the shutter button) so the subject is away from the center. And third, finish by pressing the shutter button all the way down to take the picture.
Next Tip - Look in Eyes
Previous Tip - watch the light
You'll need to lock the focus if you have an auto-focus camera because most of them focus on whatever is in the centre of the viewfinder.


Previous Tip>
Technorati Tags: Move,Centre,performer,life,Start,Imagine,grid,intersections,auto,viewfinder WordPress Tags: Move,Centre,performer,life,Start,Imagine,grid,intersections,auto,viewfinder
Blogger Labels: Move,Centre,performer,life,Start,Imagine,grid,intersections,auto,viewfinder
Bright sun can create unattractive deep facial shadows. Eliminate the shadows by using your flash to lighten the face. When taking people pictures on sunny days, turn your flash on. You may have a choice of fill-flash mode or full-flash mode. If the person is within five feet, use the fill-flash mode; beyond five feet, the full-power mode may be required. With a digital camera, use the picture display panel to review the results.
On cloudy days, use the camera's fill-flash mode if it has one. The flash will brighten up people's faces and make them stand out. Also take a picture without the flash, because the soft light of overcast days sometimes gives quite pleasing results by itself.


Next Tip> 10 tips for better clicks : Move it from the middle (Tip 2)
Technorati Tags: Read,facial,Eliminate,mode,person,feet,panel,Also,patience,Email,five,camera
Windows Live Tags: Read,facial,Eliminate,mode,person,feet,panel,Also,patience,Email,five,camera
Word Press Tags: Read,facial,Eliminate,mode,person,feet,panel,Also,patience,Email,five,camera
Blogger Labels: Read,facial,Eliminate,mode,person,feet,panel,Also,patience,Email,five,camera
I didn’t knew that i can protect my car in such a simple way.
Nice and Best
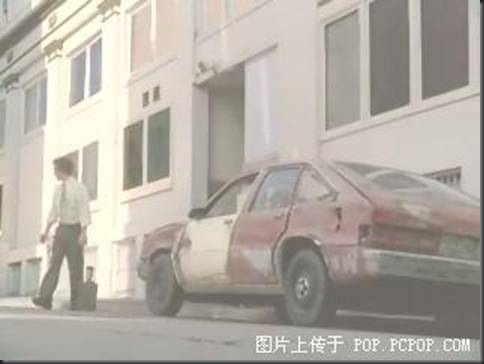


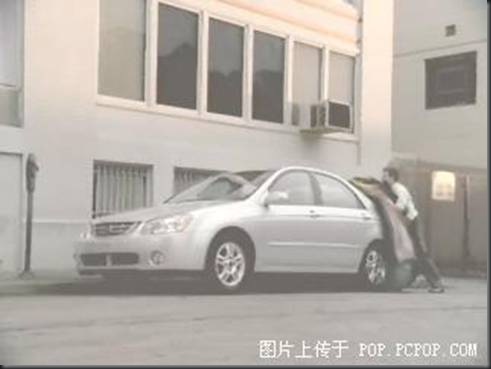
Hotel offers free meal to guests who are willing to generate electricity
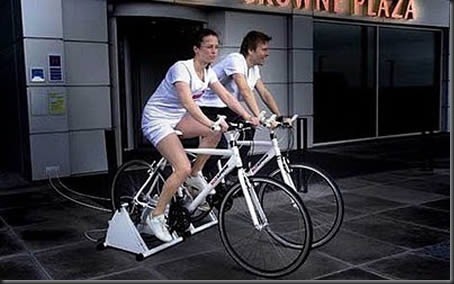
The Crown Plaza Hotel in Copenhagen , Denmark , is offering a free meal to any guest who is able to produce electricity for the hotel on an exercise bike attached to a generator. Guests will have to produce at least 10 watt hours of electricity - roughly 15 minutes of cycling for someone of average fitness. They will then be given meal vouchers worth $36 (26 euros).


All the flashing strobes and pounding speakers at the dance club are massive consumers of electrical power. So Bar Surya, in London, re-outfitted its floor with springs that, when compressed by dancers, could produce electrical current that would be stored in batteries and used to offset some of the club's electrical burden. The club's owner, Andrew Charalambous, said the dance floor can now power 60 percent of the club's energy needs.


Who says printers only use paper to print documents? It's time for you to meet the PrePeat Printer then. Different from conventional printers, PrePeat adopts a thermal head to print on specially-made plastic sheets. These plastic sheets are not merely water-proof, but could be easily erased, just feed the sheets through the printer again, and a different temperature will erase everything or just write over it. Also claimed by the manufacturer, such one sheet could be used up to 1,000 times so that you'll reduce your expenses on paper for sure.


Green design is an enormously popular trend in modern architecture, just take a look at this amazing green roof at the School of Art , Design and Media at Nanyang Technological University in Singapore . This 5-story facility sweeps a wooded corner of the campus with an organic, vegetated form that blends landscape and structure, nature and high-tech and symbolizes the creativity it houses. The roofs serve as informal gathering spaces challenging linear ideas and stirring perception. The roofs create open space, insulate the building, cool the surrounding air and harvest rainwater for landscaping irrigation. Planted grasses mix with native greenery to colonize the building and bond it to the setting.


Made of polished stained concrete, the Zen Garden Sink has a channel that allows the water used while washing your hands to water a plant. Created by young Montreal designer Jean-Michel Gauvreau the sink comes in single or double basin model. The sink is designed in a way you won't get your plants all soapy. There is a main drain at the bottom of the basin for soapy grime. Your little plant friend just gets whatever you choose to dole out.


20% of our total domestic energy usage is from hot water for showering and bathing. That's over 6 times the energy usage of domestic lighting. So designer Tommaso Colia came up with his eco-friendly shower design that will force you to get out when you take too long and waste much water. The eco_drop shower features beautiful concentric circles that will rise to force you to stop showering when you take too long, and accordingly save water.


Teaching the importance of energy conservation is the goal of this design from Tim Holley. He calls it Tio, and it's a ghost-shaped light switch that gives kids a visual reminder of how much energy they've used by leaving lights on. Tio starts out green and smiling. If the light is left on for more than four hours, he turns yellow and looks shocked. And if you dare to leave that light on for more than eight hours, sweet little Tio turns into a raging red hulk, complete with frowny mouth and angry eyes. But he won't just visually remind your kids about their energy habits; information from the light switch is sent to Tio's computer program so the entire family can see how they're doing. In a brilliant piece of visual positive reinforcement, Holley's program lets kids grow a “virtual tree†which gets bigger and healthier the more energy they save.


Staples are supposed to be so bad to the environment that a company decided to create a staple-free stapler. This product promises to make collation eco-friendly. Instead of using those thin metal planet-killers, the staple-free stapler "cuts out tiny strips of paper and uses the strips to stitch up to five pieces of paper together." You can even order them customized with your corporate logo so you can, you know, brag about what your company is doing to stop the staple epidemic.


So, here is the new method which will add exactly the same button, without adding any additional scripts to your blog.
In just two steps, you can have this button working on your blog:
STEP #1:
Log in to Blogger, go to Layout -> Edit HTML
And find (CTRL+F) this code in the template:
<div class='post-header-line-1'/>
STEP #2:
immediately below it, paste this code:
1: <!--ORKUT-SHARE-START-->2: <b:if cond='data:blog.pageType == "item"'>
3: <a expr:href='"http://promote.orkut.com/preview?nt=orkut.com&du="
4: + data:post.url + "&tt=" + data:post.title' target='_blank'>
5: <img src='http://code.google.com/apis/orkut/docs/images/share.gif'/></a></b:if>
6: <!--ORKUT-SHARE-END-Help-http://whatjainsays.blogspot.com-->You can use any image instead of the default Orkut-Share logo, like these:

DIRECT-LINK: http://i50.tinypic.com/14mz4ac.jpg

DIRECT-LINK: http://i47.tinypic.com/35bba5e.jpg
Save the widget.
To display this button, along with Twitter or Facebook buttons, use these tables:
Table to display ANY TWO BUTTONS at a time:
1: <table border="0">
2: <tr>
3: <td style="width:40%;">Paste Code For Orkut Here</td>
4: <td style="width:40%;">Paste Code For Twitter / Facebook Here</td>
5: </tr>
6: </table>
1: <table border="0">
2: <tr>
3: <td
4: style="width:25%;">Paste Code For Orkut Here</td>
5: <td
6: style="width:25%;">Paste Code For Twitter
7: Here</td>
8: <td style="width:25%;">Paste Code For Facebook
9: Here</td>
10: </tr>
11: </table>
Source:
Here comes the another feature of new orkut which I think would be very useful to Bloggers. Like Share on Twitter buttons which i explained last week, Orkut too released its API and now you can have share on orkut button on any blogging platform like WordPress and Blogger aka Blogspot Blogs.
Let’s get started with How to add Share on Orkut button in your blogpost, at the end of blog posts.
How to add Share on Orkut button on Blogger / Blogspot Blogs
Go to Edit HTML tab under Layout of Blogger — Expand Widget Templates
Press CTRL+F and find </head> Now, just above or before this paste the following code.
<!--orkut share starts here-->
<script src='http://www.google.com/jsapi' type='text/javascript'/>
<script type='text/javascript'>
google.load('orkut.share', '1');
google.setOnLoadCallback(function() {
var params = {};
params[google.orkut.share.Field.TITLE] = '<data:blog.pageName/>';
params[google.orkut.share.Field.DESTINATION_URL] = '<data:blog.url/>';
var connection = new google.orkut.share.Connection(params);
document.getElementById('orkut-share').onclick =
function(e) { connection.send('orkut.com', {}); };
}, true);
</script>
<!--orkut share end-->
Now find <div class=’post-footer-line post-footer-line-1′> and add this code immediately after it
<b:if cond='data:blog.pageType == "item"'>
 <span id="orkut-share" style="cursor:pointer; border:1px solid black">
 <img src="http://code.google.com/apis/orkut/docs/images/share.gif"/>
 </span>
</b:if>
You have successfully added share on orkut button blogger, Thanks to bloggerstop who shared this tip.
Now you can see orkut share button below each post.
How to add Share on Orkut button on WordPress blog
Comparing to Blogger, its somewhat easier to add share on orkut button on self hosted WordPress Blogs.
There is a Share on Orkut WordPress plugin which makes it very easy to do it but why add a plugin for such a small thing and increase load on webpage when you can do it simply by adding a code.
1: <a href="http://promote.orkut.com/preview?nt=orkut.com&tt=<?php the_title(); ?>&du=<?php the_permalink() ?>">
2: <img src="http://code.google.com/apis/orkut/docs/images/share.gif"> </a>
Done!
You can see its live demo below this post and do you mind sharing it on orkut? This is made simple using GET Method of Orkut API. You will see share button like this 

So you bought yourself a SLR camera. What now? You obviously need more lenses.
To find out which lenses to suit your specific use is not always easy. There are several abbreviations and specifications you need to find out, and things are not better by the fact that different manufacturers use completely different abbreviations for exactly the same properties.
Below I take a review of the important features you can find on a lens, and how the different manufacturers label them.
Please note that some specs may be slightly simplified to make the article shorter and more readable. For example, the EC designation marked on Canon lenses indicates that it has an autofocus (Electronic Focus), but also indicates which frame the lens uses.
Read the article by Morris Scjomin
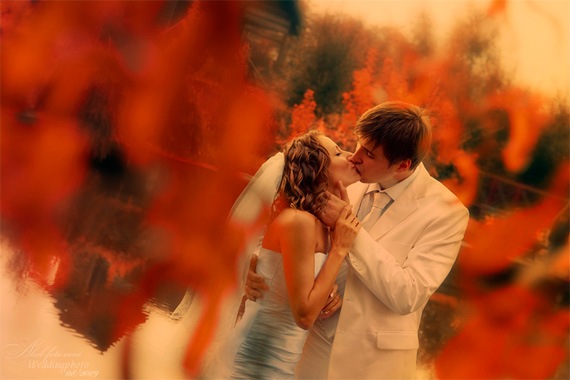
A focal point is the part of an image that draws the eye of a viewer to the most important part of the image or the area that you want to highlight. How you do this will make or break the final image. If you don’t know how to create this point then you will not achieve much in your photography.
The professionals have all worked this one out and if you are attempting to create similar images then learn this point well. It frustrates the eye of a viewer if there is no focal point as the eye is not drawn to any one particular part of the photo. The focal point only occupies a small part of the scene but will make or break the whole image. The simplest form of this is an isolated object seen from a distance on a plain background.
So how is this achieved successfully?
Read the article by Wayne Turner
Next Page
 When you click on the Tweet Button, a pop-up box containing a shortened link of the item, you want to share, will appear. You can add a line of text also. After posting on Twitter, the website may suggest you some accounts to follow.
It has made the task dead simple for the publishers too. Create a customizable Tweet button for your blog with a few clicks. Three types of Tweet buttons are available there under the “Button” tab. These are with vertical, horizontal and without retweet count.

Under the “Tweet text” option, you can add your own text. Otherwise the title of the page, you want to share, will be posted by default.

The URL of the page is the default one. However, you can suggest another URL too.

The new Tweet button is available in five languages like English, French, German, Spanish and Japanese.

A preview will be shown before you grab the single line code to use.

Just copy and paste the code into the HTML for your website wherever you want it to appear.

Websites like Ask.com, CNN, Time.com and YouTube have already started to use this new Tweet button. Start using yours too.
Source: blogsolute.com

HOW TO START YOUR DAY AT OFFICE WITH A POSITIVE
1. Open a new file in your PC.
2. Name it " Boss "
3. Send it to the RECYCLE BIN
4. Empty the RECYCLE BIN
5. Your PC will ask you, "Are you sure you want to delete Boss permanently?"
6. Answer calmly, "Yes," and press the mouse button firmly....
7. Feel better? I am sure you do..

2 tips for filling petrol and diesel:-
Only buy or fill up your car or bike during early morning, when the ground temperature is still cold. Remember that all service stations have their storage tanks underground.. The colder the ground, the more dense the fuel. When it gets warmer, petrol expands. So, buying in the afternoon or in the evening, your litre is not exactly a litre. In the petroleum business, the specific gravity and the temperature play an important role. 1 degree rise in temperature is a big deal for this business. But the service stations do not have temperature compensation at the pumps.
Another most important tip is to fill up when your tank is HALF FULL. The reason for this is, the more fuel you have in your tank the less is the air occupying its empty space. Petrol evaporates faster than you can imagine.
What JAIN Says:
DO SHARE THIS BLOG POST WITH OTHERS. IT IS IMPORTANT FOR AS MANY PEOPLE TO KNOW ABOUT THIS, ESPECIALLY IN THE WAKE OF RISING PETROL PRICES.
Ever wondered how to create a folder totally invisible (not a normal hidden file)? Well, here is the trick. This folder will be invisible and will not be visible even if your show hidden files option is checked.
- Make a new Folder
- Turn your Num Lock On and 'hold' ALT key and type 255 from NUMPAD [right end of keyboard]
- Press Enter to Save the name of folder
- Right Click the folder -> click Properties
- Go to Customize Tab -> Click Change Icon
- Scroll Left and choose the blank icon (see pic)
- Press OK. You are done!

Did you try it?
Now comes the complication. Try to rename or delete the folder.
It didn’t work rite. Wait man don’t jump on me :-) !
Let me explain. you have actually created a folder with invisble ASCII code file name. so to delete this you need to do some tricks and fool windows.
TO DELETE THIS FOLDER…
Option 1. (works on all pc)
- open the location where you created the invisible folder. (or you can use cd command to locate the file in command window)
- Hold down SHIFT key and Right click.
- Click “open command window here”
- Type the command -> rename “ALT255” del
- Your command will look like this “C:\user\username\location folder> rename “ “ del “, Then click enter
- Now your folder is visible now as “del” folder. Delete or rename as you like.
Option 2. (works on pc with win rar installed)
- Right click the invisible folder
- Select-> add to archive..
- on the opened window under “archiving options” tab, check “delete file after archiving” option.
- click ok.
- The invisible file is deleted and you have a new compressed file. Delete this also if you require.
Option 3. (needs to install software)
- Install a file shredding software like DelinvFile or Your uninstaller 2010.
- Delete the invisible file using the software. (steps vary according to software)
Option 4. (you will never reach this option)
Contact me through comments below the post. I am there to help you out.


